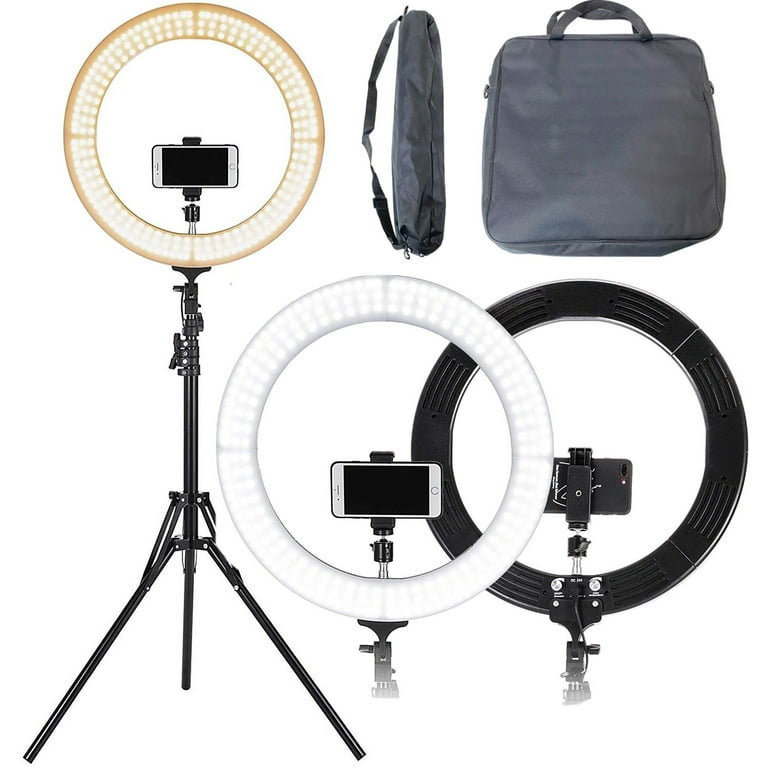
The Neewer 18 inch Ring Light is a versatile lighting tool perfect for videos, streaming, and photography.
From my experience, its key features are the adjustable brightness and variable color temperature (3200K to 5600K), controlled via a simple touch panel.
Setup is straightforward, involving assembling the stand, mounting the light, and connecting the power.
What Comes with Your Neewer 18 inch Ring Light?
When you open the box, you will find everything you need to get started, all packed in a convenient black carrying case.
My kit included the 18 inch ring light itself, a foldable light stand, a power adapter with its cable, a cold shoe mount adapter, and a smartphone holder.
Having the case is a huge plus for keeping all these parts together, whether you are storing it or taking it somewhere.
How to Set Up the Neewer 18 inch Ring Light: A 5-Step Guide
From my hands-on experience, assembling the light is simple.
Here is the exact process I follow for a stable and secure setup.
- Assemble the light stand.
- Mount the ring light onto the stand.
- Connect the power adapter.
- Attach the phone or camera mount.
- Power on the ring light.
The first thing I always do is set up the base.
Loosen the bottom knob on the light stand and spread the three legs out to their widest possible point.
This is critical for creating a stable foundation.
A common mistake I see is not giving it a wide enough base, which can lead to wobbling, especially on carpet.
Once the legs are set, you can extend the vertical poles to your desired height.
I make sure to tighten the knobs just enough to be secure, but it is important not to overtighten them, as this can strip the plastic threads over time.
Next, take the ring light itself.
On the bottom is a mounting bracket designed to fit perfectly onto the top of the stand.
Loosen the knob on this bracket, slide it all the way down onto the stand’s post, and then tighten the knob firmly to secure it.
You will notice another knob on the side of the bracket; this one controls the tilt, allowing you to angle the entire ring light up or down to get the perfect position.
Powering On and Using the Controls
The power cable is a two-part system that connects to form one long cord.
One end plugs into a standard wall outlet, and the other small, round end plugs directly into a port on the back of the ring light.
Once it is plugged in, a red power symbol will illuminate on the smooth touch panel on the front of the light.
A simple tap on that symbol is all it takes to turn the light on.
Adjusting Brightness and Color Temperature
What I’ve learned to appreciate most about this specific model is the integrated touch panel.
With older ring lights, I had to physically snap on different colored plastic filters to change the warmth of the light.
It was a clumsy process.
This version is far more convenient.
You can slide your finger along the brightness indicator to smoothly adjust the power from 0% to 100%. Beside it is the color temperature control.
This lets you change the light from a very warm, orange-ish glow (3200K) to a cool, neutral daylight white (5600K).
This feature is essential for matching the light in your room and ensuring your skin tones look natural on camera.
How to Mount a Phone or Camera
Mounting Your Smartphone
The kit includes a small metal piece called a cold shoe mount and an adjustable phone holder.
The cold shoe piece slides directly into the slot located at the top or bottom of the ring light’s inner circle.
After that, you simply screw the phone holder onto the mount.
The holder expands to grip your phone securely, and you can position it for either vertical or horizontal video.
I find this setup is perfect for recording social media videos or joining video calls.
Using a Larger Camera
While you can technically mount a small, lightweight camera directly onto the included mount, here is a piece of advice from my professional experience: be very careful.
The included light stand is designed to hold the ring light, not heavy camera equipment.
For my main mirrorless camera, I use a much safer method.
I set up the camera on its own separate, sturdier tripod and position it to look directly through the center of the ring.
This gives you the exact same beautiful, shadowless lighting effect without putting your expensive camera at risk.
Final Verdict
The Neewer 18 inch Ring Light is an excellent and affordable choice for content creators, makeup artists, and anyone needing consistent, flattering light for video.
Its straightforward setup, convenient touch controls for both brightness and color temperature, and the inclusion of all necessary accessories make it a complete out-of-the-box solution.
It performs beautifully with smartphones and webcams, instantly elevating the quality of your video feed.
For anyone looking to buy their first video light or needing a reliable, easy-to-use source of light, this is a fantastic tool that I highly recommend.
