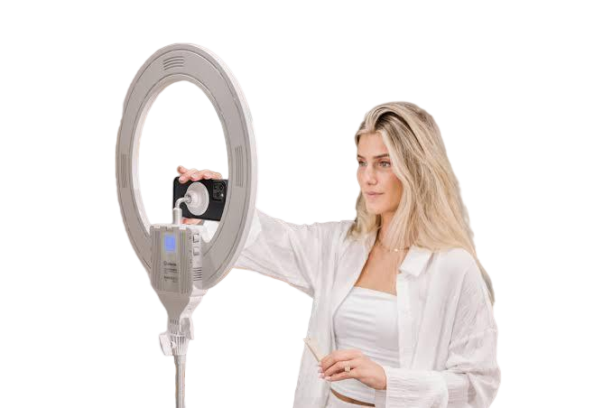
To properly use a ring light, you must move your camera or phone out of the center.
Position the ring light slightly above your head and angle it down towards your face.
This setup creates flattering shadows that define your features, removes the flat “pancake” effect, and eliminates distracting ring-shaped reflections in your eyes.
Hi there.
As someone who has spent years in photography and content creation, the most common mistake I see people make with a ring light is putting their phone directly in the middle of it.
I get it, the built-in phone holder is convenient.
But from my experience, that convenience is the single biggest thing holding you back from truly great lighting.
That popular setup was designed for ease, but it creates flat, boring, and often unflattering light.
It blasts your face head-on, wiping out all the natural shadows that give your face dimension.
My goal is to show you the simple, professional way to use a ring light.
This method will make you look your best, whether you are on a video call, taking selfies, or filming content.
Why the Standard Setup Fails You
When you place your camera inside the ring, you are lighting your face from the exact same angle as you are filming.
This results in very few shadows.
Without shadows, your face can look wide and flat.
It also creates that tell-tale circular catchlight, or reflection, in your eyes which can be distracting.
Think of it like contouring with makeup.
The goal of contouring is to add shadows to define your jawline and cheekbones.
Good lighting does the exact same thing.
The common ring light setup is the opposite of contouring; it is like putting a bright, even layer of foundation over your entire face without any definition.
The Professional Method: A Step-by-Step Guide
The secret is to treat your ring light and your camera as two separate pieces of equipment.
This gives you complete control to shape the light perfectly.
Here is how I handle my setup for every single shoot.
- Get two separate stands.
- Position the ring light above your eye level.
- Angle the light down at a 45-degree angle.
- Place your camera or phone at eye level.
- Adjust brightness and color to your preference.
By raising the light and angling it down, you are recreating a classic lighting technique called “paramount lighting.”
It is famous because it is simple and looks great on almost everyone.
This position creates a small, flattering shadow directly under your nose and soft shadows under your cheekbones and jawline, instantly adding dimension and a professional look to your image.
Frequently Asked Questions
From my experience helping others with their lighting, a few questions always come up.
What if I wear glasses?
This is a great question.
If you wear glasses, the standard setup is terrible because it creates a huge ring of glare right across your lenses.
The professional method helps a lot, but you may need to raise the light even higher and angle it more sharply downwards to completely eliminate the reflection from your glasses.
What brightness and color temperature should I use?
Start with the brightness at around 50 percent and adjust from there.
You want to be well-lit but not look like a ghost.
For color temperature, also known as the setting that makes the light look warm (yellow) or cool (blue), try to match the other lights in your room.
If you are near a window during the day, use a cooler, daylight setting.
If you are in a room with warm lamps at night, use a warmer setting.
Does the size of the ring light matter?
Yes, it does.
A larger ring light will create softer, more flattering light because the light source itself is bigger.
A smaller ring light produces harsher shadows.
If you are just starting, an 18-inch ring light is a fantastic and versatile choice that I recommend to most people.
Final Verdict
A ring light is a powerful and versatile lighting tool, but its true potential is only unlocked when you stop using the built-in phone mount.
By separating your light source from your camera, you move from basic illumination to intentional light shaping.
Raising the light above eye level and angling it down is the single most important change you can make.
This professional technique uses light and shadow to sculpt your features, creating depth and dimension that will instantly elevate the quality of your photos and videos.
